Installation
CHEESE Installation
This part is installing cheese and setting up an instance.
On-Premises License Required
To be able to install CHEESE on-premises, you need to have a valid CHEESE license. Please contact us at info@deepmedchem.com to get a license or a trial on-premises version.
Overview
- You need a device or an instance with Ubuntu 20.04 or Ubuntu 22.04 and CUDA drivers installed. Tutorial how to provision an example AWS Instance is down below. Otherwise on any other cloud or in-house machine with similar specs you are ready to go. Furthermore, git is necessary to be able to clone our repository.
- Follow the steps in the How to install CHEESE? section to install CHEESE on your device or instance. During the process, you will be asked to generate a license key and we will provide you a
CHEESE_LICENSE_FILEbased on your key. - After the installation, you can run the CHEESE tool by running the command
cheesein the terminal. See CHEESE CLI Tutorial
How to install CHEESE?
1. Clone the cheese-on-prem repository to your instance.
git clone https://github.com/Deep-MedChem/cheese-on-prem- Go to the repository folder.
cd cheese-on-prem
2. (Optional) Install Docker and CUDA Drivers
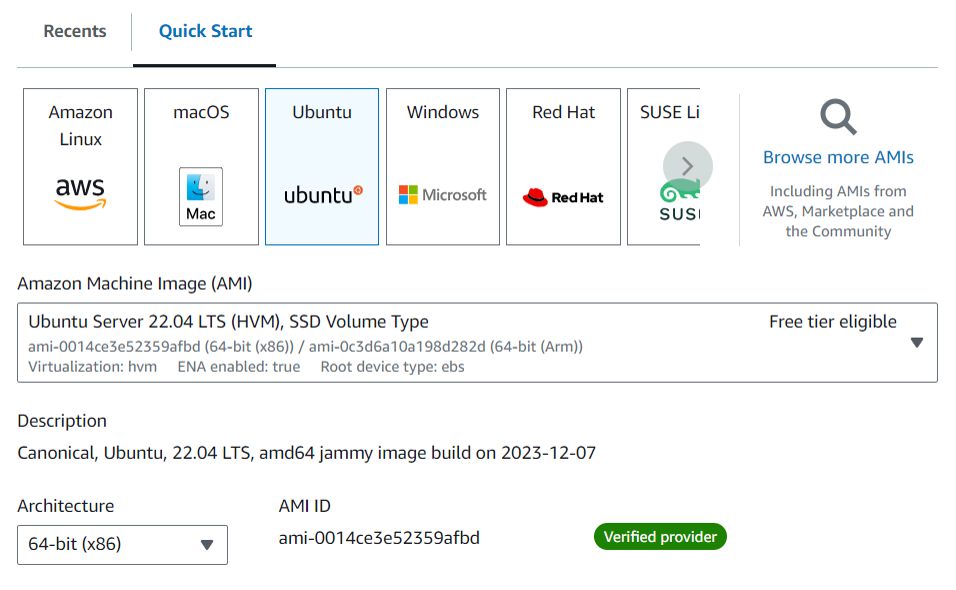
- In case you don't have them or if you are working with the following AMI : Ubuntu Server 22.04 LTS (HVM), SSD Volume Type , you need to install Docker and CUDA drivers. You can use the following steps
- Go to the
cheese-on-prem/installfolder by runningcd install - To install Docker run :
bash install-docker.sh - To install CUDA Drivers run :
bash install-cuda-drivers.sh - Reboot the machine :
sudo reboot
3. Install CHEESE CLI
cd cheese-on-prembash install-cheese.sh
4. Test if the installation is working by running the command cheese
5. Generate License key
- Run
cheese generate-license-key - Copy the generated key and send it to us. Based on it we will provide you with a license JSON file.
- Run
cheese update-licenceand paste the contents of the provided JSON in your license file. - Note that for each new installation or machine you need to generate a new license key and send it to us.
6. Test installation
To test the installation run cheese test
7. You can now configure CHEESE using the following steps:
A. CHEESE Environment setup
- Run
cheese update-env - You should see a
.conffile which defines global environment variables, and modify it accordingly.
Authentication & Identity
CHEESE_CUSTOMER=test      # Your organization name (contact us to obtain)
CHEESE_USERNAME=XXX       # Docker registry username (contact us to obtain)
CHEESE_PASSWORD=XXX       # Docker registry password (contact us to obtain)
B. CHEESE Configuration
- Run
cheese configure - This command should open a YAML file which defines CHEESE-specific configurations. This file is useful for adding more databases into CHEESE, changing the similarity metrics, and other CHEESE-specific configurations. If you are not sure about the configurations, you can use the default values.
TRANSFORMERS:
  morgan: "tanimoto"           # Morgan fingerprint similarity metric
  espsim_electrostatic: "espsim"     # Electrostatic similarity computation method
  espsim_shape: "shapesim"           # Molecular shape similarity method
  active_pairs: "active_pairs"       # Active pairs analysis method

DIM: "256"                           # Embedding dimension size

OUTPUT_DIRECTORIES:                   # Directory paths for different databases
  ENAMINE-REAL: "/data/enamine_real" # Enamine REAL database output location
  ZINC15: "/data/zinc15"            # ZINC15 database output location
  CUSTOM: "/data/custom_output"      # Custom database output location

DELIMITERS:                          # File delimiters for different databases
  ENAMINE-REAL: "\t"                # Tab-delimited for Enamine REAL
  ZINC15: ","                       # Comma-delimited for ZINC15
  CUSTOM: ","                       # Comma-delimited for custom files

INDEX_TYPES:                         # Index type configurations
  ENAMINE-REAL: "clustered"         # Clustered index for Enamine REAL
  ZINC15: "clustered"               # Clustered index for ZINC15
  CUSTOM: "in_memory"               # In-memory index for custom data
8. Done
- You should be ready to run CHEESE on your machine.
Start using CHEESE
- You have successfully installed CHEESE on your machine. Congratulations!
- Tutorials you might find useful: CHEESE CLI Tutorial, CHEESE API Tutorial (Python), CHEESE API Tutorial (Swagger)
- Feel free to contact us at info@deepmedchem.com, we are happy to help you with any issues you might have.
(Optional) Setting up Cloud Instance in AWS
- Go to your AWS account and launch a new instance.
- Choose an AWS instance that has a minimum equivalent resources to the following
- Amazon Machine Image (AMI) : Select the following deep learning AMI if your account allows it Deep Learning OSS Nvidia Driver AMI GPU PyTorch 2.3 (Ubuntu 20.04).
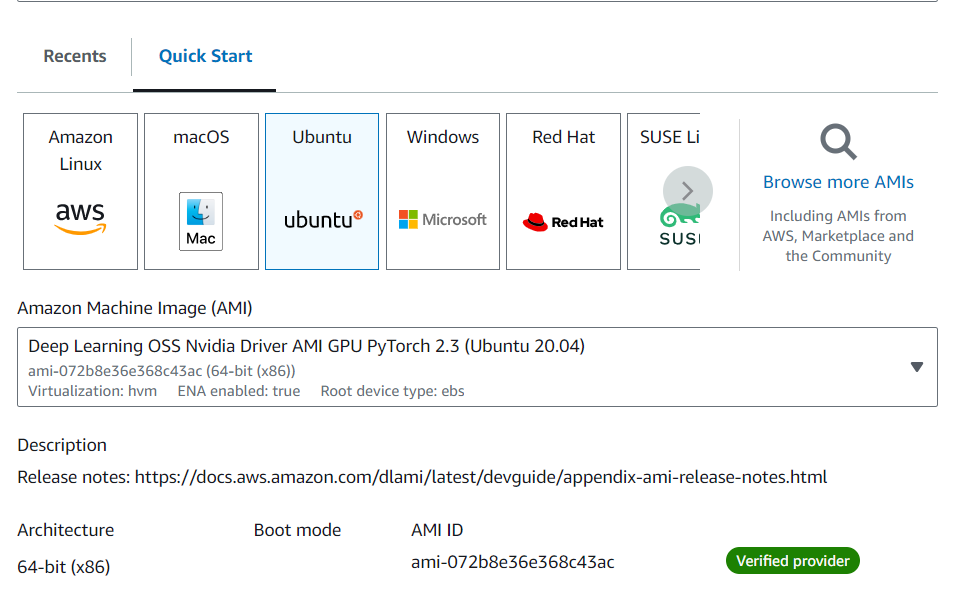
Please note that the deep learning AMI have pre-installed CUDA drivers. In case the above AMI is not available on your AWS account you can select the following one : Ubuntu Server 22.04 LTS (HVM), SSD Volume Type
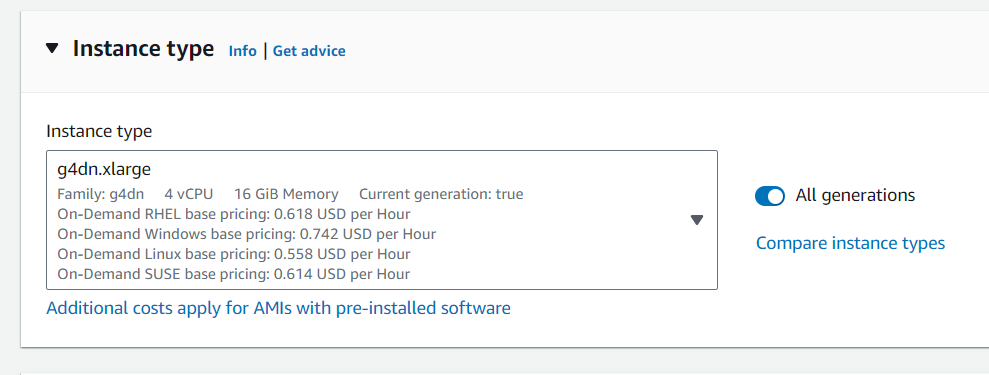
- Instance Type : g4dn.xlarge or similar → 4vCPUs, 16 GB RAM, 1 GPU with 16 GB of GPU RAM
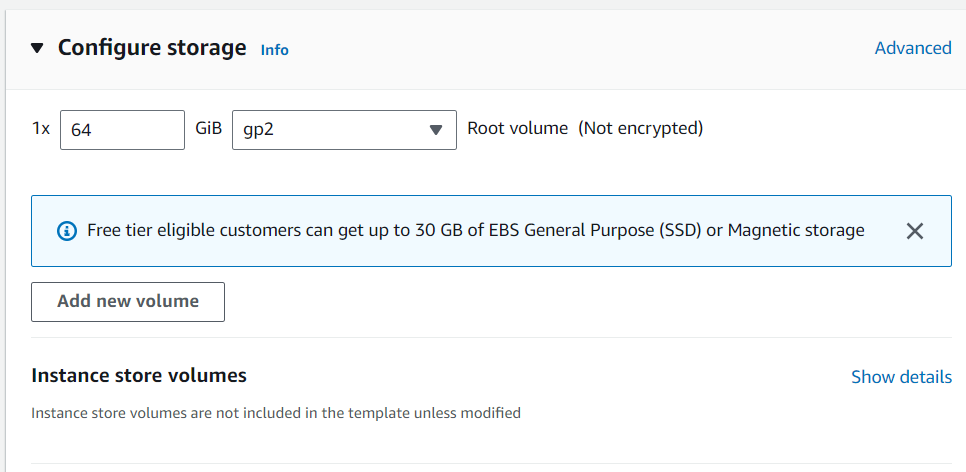
- Storage : 64 GB minimum, gp2
- Networking (Optional) : Choose a VPC and a Subnet for a private VPN.
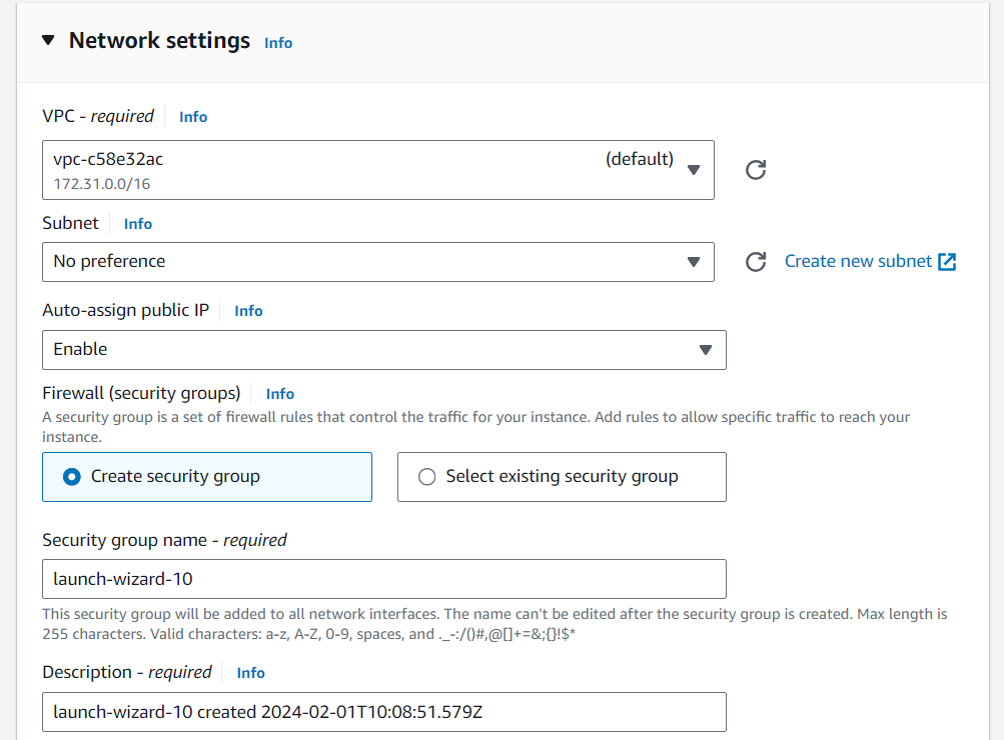
-
Security : Create a key pair for login into the instance or choose a pre-existing one.
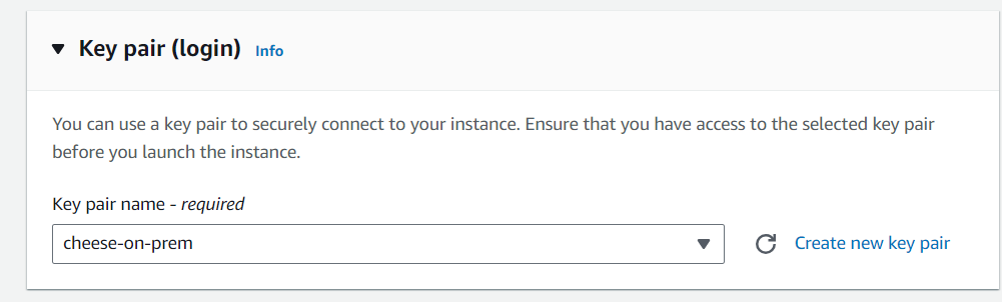
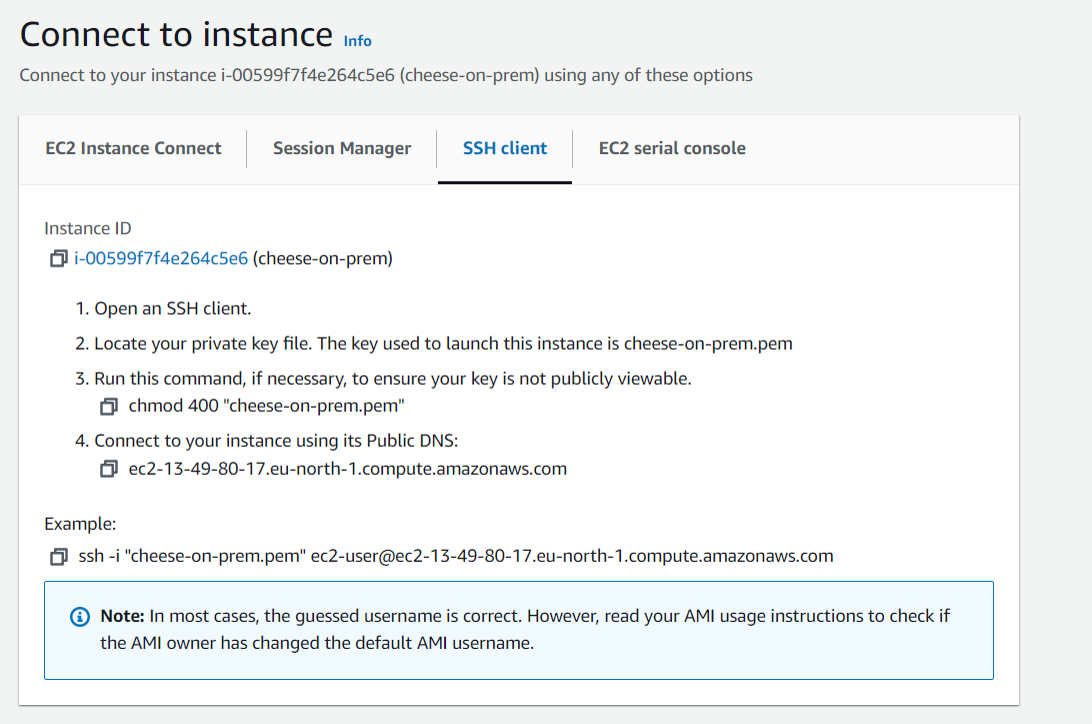
-
Download the private key and save it somewhere securely and test the connectivity using SSH using the following steps from AWS :
In case you have problems with SSH, test the connectivity to your instance by choosing the instance in the "Instances" dashboard and clicking connect, choose "connect with EC2 Instance Connect", then you'll have a shell in AWS GUI to test the instance. There you can also reset the ubuntu user password.

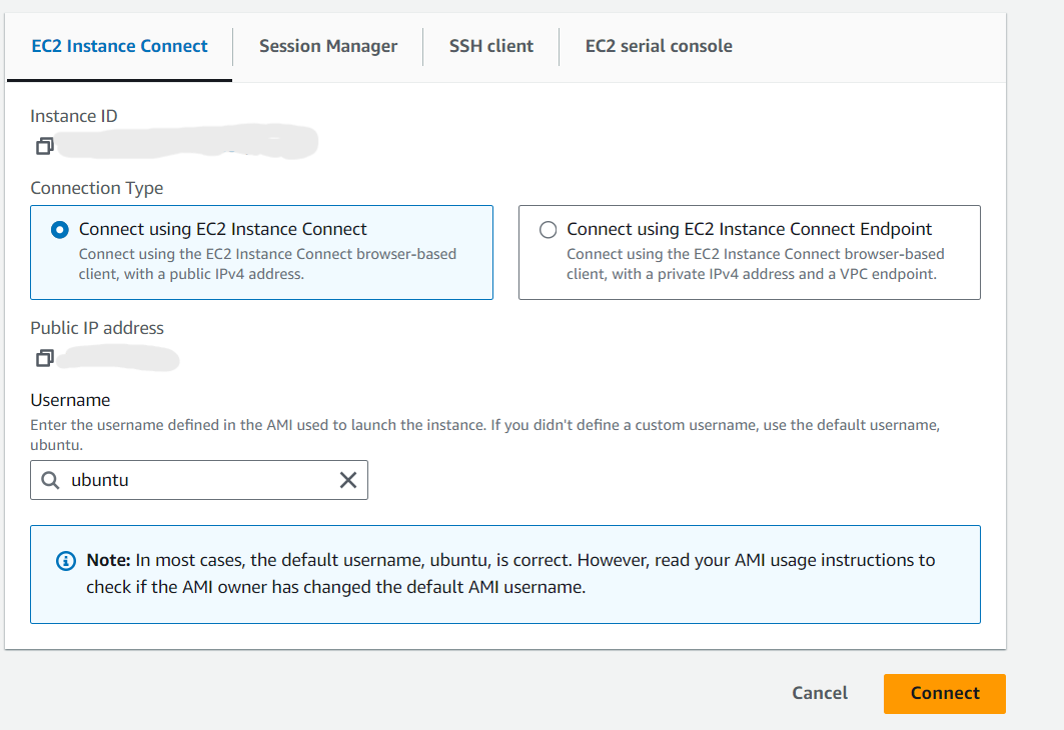
For more information please refer to the AWS Documentation.